



When checking out, simply select the "New Customer" option. All you need to get started is a valid email address and a secure password of your choosing. After your purchase is complete, your account will be created, and you will immediately gain all the benefits of being an account holder. If you have previously placed an order with us as a guest, you can try using the "Forgot Password" feature under the "Sign In" tab.
Benefits of having an account:
Real-time status updates on all your orders and returns.
Ability to view detailed order history.
Eligibility to enroll in subscription items for recurring discounts.
Access to more store features and quicker customer support.
Connection to a dedicated sales representative if placing bulk orders.
Manage your account settings:
Update your email address and password.
Unsubscribe from email promotions.
Manage item subscriptions.
Delete your account and remove your information.
We respect your privacy and are committed to protecting any personal information you may provide us through our Website. View our privacy policy for more info.
A Honeywell humidifier may stop producing moisture because of an empty or improperly seated tank, mineral buildup, a hardened wick, a stuck water-level float, or a control setting that prevents the unit from running. Leaks, warning lights, noises, and odors can often be traced to routine setup or maintenance issues.
This Honeywell humidifier troubleshooting guide covers portable ultrasonic, evaporative cool-moisture, and warm-mist humidifiers, followed by separate guidance for Honeywell Home whole-house bypass and powered flow-through models. Procedures vary by model, so use the model number on the appliance to confirm instructions in the corresponding owner’s manual.
Important Safety Precautions
Turn off and unplug a portable humidifier before removing the tank, freeing a float, or cleaning the reservoir.
Allow a warm-mist humidifier to cool for at least the time specified in its manual before moving or cleaning it.
Never submerge the electrical base or allow water to enter control knobs, vents, or motor openings.
Never mix vinegar and bleach. Descaling and disinfecting must be completed as separate processes with thorough rinsing between them.
Shut off furnace power and the humidifier’s water supply before servicing a whole-house unit.
Do not open a motor housing, test live wiring, or disassemble a solenoid valve unless you are qualified to perform electrical and plumbing work.
Quick Humidifier Diagnostic Table
Symptom
Likely Cause
Quick 30-Second Check
No mist or moisture
Empty tank, unseated tank, scale, dry wick, or control setting
Confirm water, level placement, correct assembly, and a humidity setting above current room humidity
Water leaking from base
Loose cap, missing gasket, cracked tank, or misplaced float
Unplug the unit, remove the tank, and inspect the cap, gasket, tank seams, and float position
Red or refill light stays on
Tank not feeding, stuck float, scaled sensor, or model-specific reset required
Refill and reseat the tank, then check whether the float moves freely with the unit unplugged
Loud clicking, rattling, or humming
Unlevel surface, loose component, scaled heating element, or fan obstruction
Turn off the unit, place it on a level surface, and reseat the tank, wick holder, mist outlet, and removable covers
White dust
Hard-water minerals dispersed by an ultrasonic model
Switch to distilled water or install a compatible demineralization cartridge
Musty or sour smell
Stagnant water, contaminated reservoir, or deteriorated wick
Stop operation, empty the unit, and inspect the tank and wick for odor, slime, or discoloration
Whole-house unit receives no water
Closed water valve, clogged feed line, failed solenoid, or open control circuit
Confirm the water valve is fully open, the bypass damper is in its winter position, and the HVAC blower is operating
Issue 1: Honeywell Humidifier Not Producing Mist or Steam
If a Honeywell humidifier stopped misting, begin by identifying its operating technology. Ultrasonic models normally release visible cool mist. Warm-mist units release visible steam after the water heats. Evaporative cool-moisture models release invisible moisture, so the absence of visible mist may be normal.
Ultrasonic Cool-Mist Models
An ultrasonic humidifier uses a metal nebulizer disc that vibrates at high frequency. Mineral scale can slow the nebulizer enough to reduce or stop visible mist. The tank must also be fully seated so its valve releases water into the base.
Verify the power source. Plug the humidifier directly into a working wall outlet and confirm that its power control is on.
Check the water level. Refill the tank with cool water and tighten the cap without cross-threading or overtightening it.
Reseat the tank. Lower it squarely onto the base so the tank valve contacts the base mechanism correctly.
Check the surface. Move the humidifier to a firm, level, water-resistant surface. An angled base can interfere with water detection.
Inspect the reservoir. With the unit unplugged, confirm that water has entered the base and that any float ring or paddle moves freely.
Inspect the nebulizer. Look for a chalky white crust on or around the round metal disc.
Descale if necessary. Cover the nebulizer area with undiluted distilled white vinegar, soak for at least 20 minutes or as directed by the manual, and wipe gently with a soft cloth or cleaning brush.
Rinse and retest. Rinse until the vinegar odor is gone, reassemble the unit, refill it, and test the mist output.
Do not touch or scrape the nebulizer with a metal tool. Excessive pressure can permanently damage the disc.
Evaporative Cool-Moisture Models
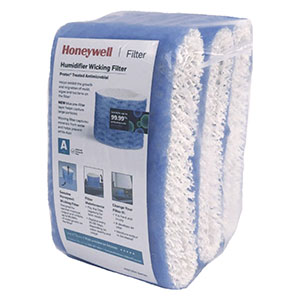
Evaporative units use a fan to move air through a wet wicking filter. A search for Honeywell cool mist fan running no steam may describe normal operation if the unit is actually an evaporative cool-moisture model. These units produce invisible moisture rather than visible steam or fog.
Confirm the model type. Check the manual or product label to determine whether the humidifier is evaporative.
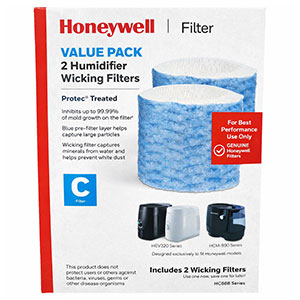
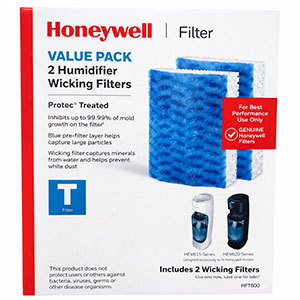
Check the wick. A dry, hardened, heavily discolored, or mineral-crusted filter may no longer absorb enough water.
Reseat the filter and holder. Make sure the wick is installed in the correct orientation and is not folded or compressed.
Flip the wick if permitted. Some Honeywell models recommend turning the filter top-to-bottom with each refill to keep it evenly saturated.
Check the humidity setting. Raise the humidistat setting above the room’s current relative humidity. The fan may stop or cycle when the selected humidity level has been reached.
Inspect the air openings. Remove dust from exterior intake and outlet grilles without opening the motor housing.
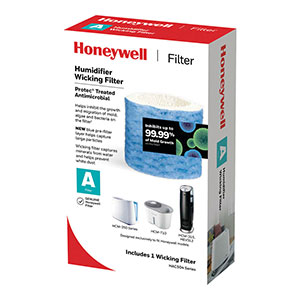
Replace the wick when necessary. A hardened or poorly absorbing filter generally needs replacement rather than chemical cleaning.
Never wash a wicking filter with soap, bleach, vinegar, or other cleaning chemicals. If the fan does not run after the controls, outlet, tank, filter, and humidistat have been checked, the motor or internal electronics may require professional service or unit replacement.
Warm-Mist Models
Warm-mist humidifiers may require three to four minutes or longer to heat the water before visible steam appears. If the unit has power but produces little or no steam, check the water level, tank seating, level placement, and heating element for mineral scale.
Turn off and unplug the humidifier before inspection. Allow the appliance to cool completely, then follow the model-specific vinegar descaling procedure. Do not touch the steam outlet or heating element while the unit is hot.
Issue 2: Water Leaking From the Base or Tank
A Honeywell humidifier leaking water from bottom does not automatically mean the base is cracked. Water commonly escapes when the tank cap is loose or cross-threaded, the rubber cap gasket is missing, the tank is not seated correctly, or the float mechanism was reinstalled improperly after cleaning.
Common Causes of Humidifier Leaks
Tank cap is loose, overtightened, or cross-threaded
Rubber gasket or O-ring is missing, twisted, cracked, or hardened
Spring-loaded tank valve or plunger is stuck open
Tank has a hairline crack around a seam, handle, or cap opening
Float paddle, ring, or water tray is incorrectly installed
Humidifier is sitting on a sloped, soft, or unstable surface
Base reservoir was manually filled above its intended level
Water entered the base during cleaning from the wrong pouring direction
Condensation around the unit is being mistaken for a tank leak
How to Inspect the Tank Valve and Seal
Turn off and unplug the humidifier.
Move the unit to a water-resistant counter or sink area.
Remove the tank and empty it completely.
Remove the cap and inspect the rubber gasket. It should lie flat without tears, stretching, or mineral crust.
Check the cap threads for damage and reinstall the cap straight. Tighten it securely without forcing it.
Press the spring-loaded valve over a sink. It should move smoothly and return to its closed position when released.
Fill the tank partially and hold it over the sink to check for dripping around the cap, valve, and tank seams.
Inspect the base float, water tray, and removable components for correct placement.
Place the tank squarely on the base and watch for uncontrolled water flow.
Do not attempt to seal a cracked tank with household glue or tape. Replace the tank or gasket with a part approved for the exact model.
Leak or Condensation?
If water appears only after several hours of operation, inspect nearby walls, windows, furniture, and the surface under the mist stream. Excessive output can cause mist to settle and create a puddle that resembles a leaking base. Reduce the output, redirect the mist, and keep indoor humidity below 50%.
Issue 3: Refill or Red Light Stays On
A Honeywell humidifier red light stays on when the appliance still detects an empty reservoir, requires a model-specific reset, or cannot feed water from the tank into the base. The exact meaning of a red or amber light varies by model.
Why the Water Sensor May Not Reset
Tank is not fully seated on the base
Tank-cap valve is not opening
Air is temporarily trapped in the tank or valve assembly
Float ring or paddle is stuck at the bottom of its guide
Mineral scale is covering a float, probe, or sensor contact
Float or water tray was installed backward after cleaning
Warm-mist heating element is heavily scaled
Required refill-reset procedure was not completed
Float and Water-Sensor Reset Procedure
Turn the humidifier off and unplug it.
Remove and refill the tank, then verify that the cap and gasket are installed correctly.
Inspect the tank valve for free movement and reseat the tank on the base.
Remove enough water from the base to clearly inspect the float mechanism.
Move the float ring or paddle gently through its normal path. Do not bend, pry, or remove a permanently attached sensor.
If the Honeywell humidifier float stuck condition is caused by scale, apply distilled white vinegar to the affected reservoir area and soak according to the manual.
Wipe the float guide and sensor area with a soft cloth or cotton swab. Do not use a knife, abrasive pad, or metal tool.
Rinse thoroughly and reinstall the float, paddle, or water tray in the correct orientation.
Reassemble the unit, restore power, and complete the reset procedure specified for the model.
On certain HWM845 warm-mist models, the reset process is to turn the power off, refill and replace the tank, wait five minutes, and turn the power back on. If the light remains illuminated, the heating element may need descaling. Other models use different procedures, so do not assume that one reset method applies to every Honeywell humidifier.
Issue 4: Loud Rattling, Clicking, or Humming Noises
The phrase Honeywell humidifier noise clicking rattling can describe either normal water movement or a maintenance problem. Light gurgling may occur as water leaves the tank, and electronic humidistats may click when cycling the unit on or off. Persistent grinding, scraping, or heavy rattling is not normal.
Common Noise Sources
Unlevel placement: A tilted unit can make the tank, fan, or water-level mechanism vibrate.
Loose components: An improperly seated tank, mist outlet, filter holder, water tray, or removable cover may rattle.
Hardened wick: Restricted airflow can increase fan noise and reduce output.
Fan obstruction: Dust, packaging material, or a damaged internal fan component can cause clicking or scraping.
Heating-element scale: Mineral buildup can cause warm-mist models to pop, crackle, or produce less steam.
Water-feed sounds: Occasional gurgling or clicking as the tank releases water may be normal.
Noise Troubleshooting Steps
Turn off and unplug the humidifier.
Place it on a firm, flat surface rather than carpet, a towel, or soft furniture.
Reseat all user-removable parts.
Inspect the wick and replace it if it is hard or deformed.
Clean mineral scale from the nebulizer or heating element according to the manual.
Remove visible dust from exterior grilles with a soft brush or vacuum attachment while the unit is unplugged.
Restart the unit at its lowest setting and listen for changes.
Do not insert tools into the fan opening or open the motor housing. If grinding, electrical buzzing, or burning odors continue, discontinue use and contact product support.
Issue 5: White Dust or Musty Odors
Honeywell Humidifier White Powder Fix
Ultrasonic humidifiers can disperse calcium, magnesium, and other minerals found in hard tap water. After the water droplets evaporate, those minerals settle on furniture and floors as white powder.
Switch to bottled water labeled distilled.
Use a compatible Protec PDC51V2, Honeywell HDC500, or other model-specific demineralization cartridge when supported.
Descale the tank, reservoir, and nebulizer with distilled white vinegar.
Replace a depleted cartridge when white dust returns.
Consider an evaporative cool-moisture model if hard water makes ultrasonic operation impractical.
A Honeywell humidifier white powder fix should address both the water source and the existing scale inside the unit. Changing to distilled water without cleaning the reservoir may leave old mineral deposits behind.
Musty, Sour, or Stale Odors
Odors usually indicate stagnant water, residue in the tank, or a contaminated wicking filter. Stop using the humidifier until it has been cleaned.
Turn off and unplug the appliance.
Empty the tank and base completely.
Remove the wick from an evaporative model. Replace it if it smells musty, shows mold, or remains badly discolored.
Descale the tank and reservoir with distilled white vinegar according to the manual.
Empty and thoroughly rinse away all vinegar.
Disinfect the appropriate tank and reservoir components using the model-specific diluted bleach instructions.
Rinse repeatedly until no bleach odor remains.
Allow the components to dry before reassembly if the unit will not be used immediately.
Never soak a wicking filter in vinegar or bleach. Never combine vinegar and bleach, because the mixture can release dangerous chlorine gas.
Issue 6: Honeywell Whole-House Humidifier Has No Water
A search for Honeywell whole house humidifier no water usually involves a Honeywell Home or Resideo bypass or powered flow-through humidifier connected to the furnace ductwork. These systems typically require an open water supply, a functioning solenoid valve, a humidity demand, and proof that the furnace blower is operating.
Common Whole-House Water-Flow Problems
Water-supply or saddle valve is closed or partially blocked
Feed-water tube is kinked, frozen, or clogged
Solenoid valve or its inlet screen is obstructed by sediment
Solenoid coil has failed
Humidistat is set below the current indoor humidity
Furnace blower, sail switch, pressure switch, or airflow sensor is not closing the control circuit
Low-voltage transformer or 24-volt wiring connection has failed
Bypass damper remains in its closed summer position
Water distribution tray or evaporator pad is clogged
Drain line is blocked, kinked, or installed without a continuous downward slope
Whole-House Diagnostic Procedure
Identify the model. Determine whether the system is bypass, powered flow-through, drum, or steam. The procedures are not interchangeable.
Check the season settings. Confirm that the humidistat is on and that a bypass damper is in its open or winter position.
Confirm the water supply. Verify that the water valve is fully open. A saddle valve is intended to be fully open or fully closed, not used to regulate flow.
Inspect visible tubing. Look for kinks, leaks, freezing, or disconnected feed and drain tubing.
Create a humidity demand. Raise the humidistat above current indoor humidity. Some installations operate only during a call for heat or while the furnace blower is running.
Listen for the solenoid. A click may indicate that the low-voltage control circuit is energizing the valve, although a click does not confirm water flow.
Observe the drain. On applicable flow-through models, water should pass across the pad and exit through the drain while the system is operating.
Inspect the pad and tray. Shut off power and water before checking for mineral buildup in the distribution tray or evaporator pad.
Request service when necessary. If the valve is open but no water enters, the solenoid, inlet screen, transformer, humidistat, airflow switch, or wiring may require professional testing.
Whole-House Service Warning
Whole-house humidifiers combine plumbing, furnace airflow, line-voltage equipment, and low-voltage controls. Turn off the furnace disconnect and close the humidifier water valve before removing covers. Have an HVAC professional diagnose live 24-volt circuits, replace solenoid valves, or modify furnace-control wiring.
The Bottom Line
Most cases of a Honeywell humidifier not working can be narrowed down by checking the water supply, tank seating, float movement, filter condition, mineral buildup, and control settings. Begin with the least invasive checks and clean only the components identified in the model’s manual.
Leaks, red lights, noises, white dust, and odors frequently improve after correct reassembly and routine maintenance. Stop troubleshooting and request qualified service when the problem involves damaged electrical parts, inaccessible fan components, whole-house wiring, or pressurized plumbing connections.