



Product Support & Resources

Featured Products

How to Open or Take Apart a Honeywell Fan

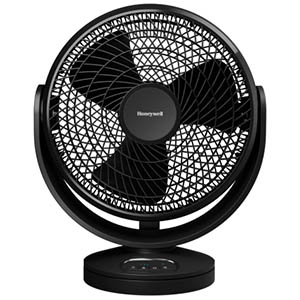
Opening a Honeywell fan can provide access for cleaning, removing trapped debris or checking whether a grille has been assembled correctly. However, the safe disassembly limit depends on the fan type and model. Some TurboForce fans have a user-removable front grille, while Honeywell QuietSet instructions generally limit owners to exterior cleaning and removal of assembly components such as the base.

This guide explains how to take apart a Honeywell fan without presenting service-only motor or electrical repairs as routine maintenance. Identify the exact model number before removing any screws, since similarly shaped fans may use different housings and fasteners.

Safety Precautions and Tools

Turn off and unplug the fan before removing the base, grille or any other component. Wait until all moving parts stop. Never rely solely on the power button to prevent an electrical or blade-contact hazard.

Depending on the manufacturer-approved procedure for the model, useful tools may include:

  • Long-neck #1 and #2 Phillips screwdrivers
  • Soft cloth or towel to protect the housing
  • Plastic opening tool for an owner-removable clip identified in the manual
  • Small cup or magnetic tray for loose screws
  • Phone or camera for documenting screw and cord locations
  • Vacuum, flexible dust wand and compressed air for cleaning

Torx or star-bit screwdrivers, including T10 and T15 sizes, may fit service-only fasteners on certain products. They are not part of the normal owner-cleaning procedure unless official documentation for the exact model expressly authorizes housing removal.

Opening the motor or electrical housing beyond an approved grille or base-removal procedure may damage the fan, cause personal injury and affect warranty coverage.

Identify the Fan and Your Reason for Opening It

Find the Model Number

Look for the product label on the bottom, rear housing or underside of the base. Record the complete model number, including any letters or series designations. Do not assume that instructions for one TurboForce or QuietSet model apply to another.

Determine How Much Access You Need

  • Cleaning visible dust: Use a vacuum, compressed air or flexible dust wand without disassembly.
  • Cleaning TurboForce blades: Remove the front grille only when the model’s manual provides instructions.
  • Cleaning a tower-fan base: Remove owner-assembled base components according to the assembly instructions.
  • Accessing a motor, control board or wiring: Contact consumer support or a qualified appliance technician.
  • Removing an obstruction: Stop if the obstruction cannot be reached without opening the electrical housing.
Know the Safe Disassembly Boundary

A removable grille or base is different from the motor housing. Removing owner-assembly parts can be appropriate when the manual explains how to install them. Opening the main shell, motor compartment, controls or oscillation mechanism is not routine owner maintenance.

Disassembling a Honeywell TurboForce Fan

Customers asking how to open Honeywell fan models commonly want access to dust-covered TurboForce blades. On compatible models, this can be accomplished by removing the front grille while leaving the blade, motor and rear housing assembled.

Step 1: Unplug and Position the Fan

  1. Turn the speed control to the off position.
  2. Grip the plug and remove it from the wall outlet.
  3. Wait for the blade to stop completely.
  4. Place a towel on a sturdy table or other flat work surface.
  5. Lay the fan face down so the rear housing and recessed screws face upward.
  6. Support the fan so it cannot pivot or roll while you work.

Step 2: Locate the Rear Housing Screws

TurboForce models with removable grilles commonly have recessed screws positioned around the rear grille. Use a flashlight if the screw heads are difficult to see.

  1. Inspect every recessed opening around the rear housing.
  2. Choose a Phillips screwdriver that seats fully in the screw head.
  3. Photograph the screw locations before loosening them.
  4. Turn each approved grille screw counterclockwise.
  5. Keep removable screws in a cup or magnetic tray.

Some versions use captive screws that remain attached to the rear housing. Do not pull on or attempt to extract a captive screw after it has been fully loosened.

Step 3: Separate the Front Grille

For proper Honeywell fan front grill removal, confirm that every perimeter screw has been loosened before applying pressure to the housing seam.

  1. Keep one hand beneath the front grille so it cannot fall.
  2. Slowly lift the fan by its rear carrying handle.
  3. Separate the front grille along the seam where the screws were located.
  4. Watch for loose screws that may fall when the fan is repositioned.
  5. Place the removed grille on a clean towel.

The grille may contain locating tabs that align it with the rear housing. These tabs normally disengage when the properly loosened grille is separated. Do not force them sideways.

What If the Grille Uses Clips?

If the manual for the exact model identifies removable clips, release them individually while supporting the grille.

  • Use your fingers or a plastic opening tool.
  • Begin at the designated release point or visible notch.
  • Use light pressure and work around the grille gradually.
  • Do not insert a metal flathead screwdriver deeply into the seam.
  • Stop if the plastic bends, turns white from stress or begins to crack.

A grille that remains firmly attached may have a hidden screw or may not be designed for owner removal.

Should You Remove the TurboForce Fan Blade?

Normally, no. Honeywell’s owner-cleaning procedure for common TurboForce models provides access by removing the front grille but does not instruct the owner to remove the blade from the motor shaft.

A central retaining cap, ring or shaft fastener is not a universal user-serviceable component. Its thread direction and retention method may vary. Removing it could damage the blade, disturb its balance or expose the motor shaft.

To clean the blade, leave it attached and:

  1. Support each blade gently from behind.
  2. Wipe both sides with a soft, barely damp microfiber cloth.
  3. Use compressed air around the hub without forcing the blade to spin rapidly.
  4. Keep liquid away from the motor and shaft opening.
  5. Do not apply oil or lubricant.
Stop Before Opening the Motor Housing

Do not remove the rear motor housing, speed-control assembly, wiring or motor mount as part of routine cleaning. If a foreign object remains trapped behind the blade or the motor requires service, contact a qualified technician.

Reassembling a Honeywell TurboForce Fan

Follow these Honeywell fan reassembly instructions after the grille and blade are clean and completely dry.

  1. Collect all original grille screws.
  2. Lay the fan on its back with the blade facing upward.
  3. Locate the alignment notch on the front grille.
  4. Match the grille notch with the corresponding notch at the bottom of the fan housing.
  5. Check that every locating tab and screw hole aligns.
  6. Place the front grille against the housing without forcing it.
  7. Carefully turn the fan face down while holding the grille in position.
  8. Start each screw before fully tightening any individual fastener.
  9. Tighten the screws gradually in an alternating pattern.
  10. Stop when the grille is secure and the housing seam is evenly closed.

Do not overtighten screws installed in plastic. Excessive force can strip the threads or crack the housing.

Disassembling a Honeywell QuietSet Tower Fan

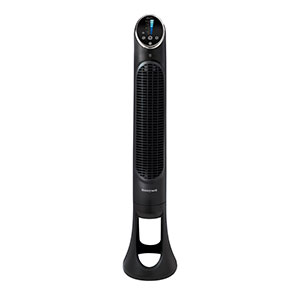
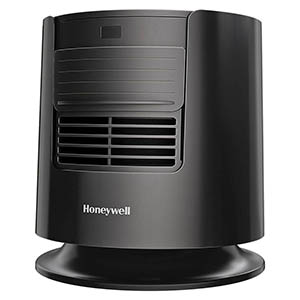
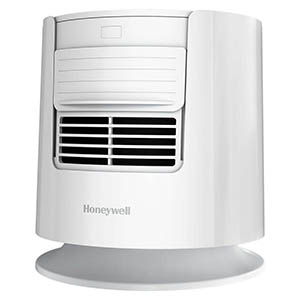
Customers searching for how to disassemble Honeywell QuietSet tower fan models should distinguish base removal from opening the main electrical housing. The base is an owner-assembled component on many QuietSet models. The casing surrounding the motor, cylindrical drum and controls is not identified as an owner-serviceable cleaning area.

Removing a QuietSet Base

This general Honeywell fan base collar removal procedure applies to certain QuietSet models that use two thumb screws and a large locking nut. Compare every step with the manual for your exact model.

  1. Turn off and unplug the fan.
  2. Remove the remote from its storage compartment.
  3. Place the fan carefully on its side on a padded surface.
  4. Photograph the cord guides, exit channel and fastener positions.
  5. Remove the two thumb screws when present and place them in a container.
  6. Gently release the power cord from the molded guides inside the base.
  7. Turn the large locking nut or collar counterclockwise until it releases from the fan housing.
  8. Pass the power cord and plug through the center of the locking nut.
  9. Support the tower housing while sliding the base away from it.
  10. Separate the base halves only if the model’s assembly instructions show that they snap apart.

Some models use Phillips screws, a separate pedestal or a twist-lock connection instead of a large collar. Do not force the base if it does not match the procedure above.

What Can Be Cleaned With the Base Removed?

  • Both sides of removable plastic base sections
  • The molded power-cord guides
  • The rear cord-exit channel
  • Exterior surfaces around the bottom of the housing
  • Accessible intake openings using a vacuum or compressed air

Base removal should not be treated as an access point for reaching the motor or oscillation mechanism.

Should You Remove QuietSet Housing Screws?

No, not as part of routine owner maintenance. Honeywell QuietSet housing screws located behind the base, inside recessed openings or along the back shell may secure the motor, controls, internal wiring or oscillation assembly.

Phillips, Torx or concealed screws do not necessarily indicate that the casing is intended for consumer disassembly. Removing them may release internal parts that are difficult to align safely during reassembly.

Should You Separate the Plastic Casing Halves?

Honeywell’s QuietSet owner instructions warn against opening the motor housing. For that reason, this guide does not recommend prying apart the tower’s main casing halves.

Attempting to separate them can:

  • Break concealed locking tabs
  • Damage control-panel ribbon cables or wires
  • Dislodge the oscillation mechanism
  • Change the alignment of the cylindrical fan drum
  • Create rubbing, vibration or electrical hazards
  • Affect warranty coverage

Can You Access the Cylindrical Drum Blades?

The internal drum should be cleaned through the existing intake and outlet grilles. Do not remove motor-mount screws or reach into the casing with a rigid or metal tool.

  1. Keep the fan unplugged.
  2. Vacuum the front and rear grilles with a soft brush attachment.
  3. Use a flexible dust wand to loosen debris near the openings.
  4. Apply short bursts of compressed air through the grilles.
  5. Vacuum again to collect the loosened dust.
  6. Repeat from several exterior angles without forcing the drum to rotate.
When Internal Service Is Necessary

Contact Honeywell fan support or a qualified appliance technician if the internal drum is obstructed, scrapes the casing, will not rotate, contains inaccessible compacted debris or requires motor removal. A technician should use service documentation specific to the model rather than relying on generic screw locations or assumed Torx sizes.

Honeywell QuietSet Base Reassembly

Reconnect the Base

  1. Confirm that every cleaned component is dry.
  2. Arrange the front and rear base sections in their original orientation.
  3. Pass the power cord through the center opening.
  4. Align the base tabs and gently snap the sections together.
  5. Position the back of the base with the back of the fan housing.
  6. Lower the fan housing into the base and rotate it gently until seated.
  7. Pass the cord through the locking nut.
  8. Turn the locking nut clockwise until the tower is secure. Some models make a ratcheting sound as the nut tightens.

Route the Power Cord

  1. Place the fan carefully on its side.
  2. Remove excess cord slack without pulling on the internal connection.
  3. Press the cord into the molded guides along the base.
  4. Route it through the designated rear exit notch.
  5. Reinstall the thumb screws or model-specific base fasteners.
  6. Confirm that no portion of the cord passes beneath the base.

Portable Fan Setup and Safety Check

Complete this Honeywell portable fan setup checklist before restoring power.

  • Every approved grille or base fastener has been reinstalled.
  • The housing seam is even and the grille does not move.
  • The tower base is fully locked and rests flat.
  • The cord is routed through its dedicated channel.
  • No tools, screws or cleaning materials remain inside or near the fan.
  • The housing, grille and base are completely dry.
  • The cord and plug are not damaged.

Check Blade Movement Before Powering On

For an unplugged TurboForce fan with its approved removable grille open, gently rotate the exposed blade by hand before reattaching the grille. It should move without scraping the rear housing. Keep fingers away from the motor shaft and do not force a resistant blade.

Do not insert fingers or tools through a QuietSet grille to spin its internal drum. Use the powered low-speed test after the base is fully assembled.

Perform a Low-Speed Test

  1. Place the completely assembled fan upright on a dry, level surface.
  2. Confirm that the power control is off.
  3. Plug the fan directly into an appropriate wall outlet.
  4. Start the fan at its lowest speed.
  5. Listen for rubbing, scraping, repeated clicking or grinding.
  6. Check that airflow is steady and the housing remains stable.
  7. Test the remaining speeds one at a time.
  8. For an oscillating model, verify that it moves smoothly without pulling the base.

Turn the fan off and unplug it immediately if it vibrates excessively, produces a burning odor, makes an electrical buzzing sound or has a blade or drum that contacts the housing.

Honeywell Fan Disassembly Questions

How Far Can I Safely Disassemble a Honeywell Fan?

Limit disassembly to components the owner’s manual instructs the customer to assemble or remove. This may include a TurboForce front grille or a QuietSet base. Motor housings, controls and internal wiring should remain closed.

Why Will My TurboForce Front Grille Not Open?

A recessed screw may remain engaged, a captive screw may not be fully loosened or the model may not have a removable grille. Stop and verify the model’s cleaning instructions instead of forcing the seam.

Can I Use a Flathead Screwdriver to Pry Open the Housing?

Do not pry open the main housing with a metal screwdriver. It can crack plastic tabs, damage hidden wiring and slip into electrical components. Use a plastic tool only for an owner-removable clip specifically identified in the manual.

Do I Need a T10 or T15 Torx Driver?

Not for normal cleaning or base removal unless official instructions for the exact model specify one. Torx fasteners may indicate a service-only assembly rather than an owner-access panel.

Will Taking Apart the Fan Void Its Warranty?

Removing components beyond the procedures described in the owner’s manual may affect warranty coverage. Review the warranty and contact consumer support before opening the main housing.
Related Products

Related Support Topics

Explore related support articles and resources for this topic.

View All Product Support Topics

Haven't found the answer? We can help.

Contact Us

Contact options may differ depending on the type of help you need.

0 $0.00
Top