When checking out, simply select the "New Customer" option. All you need to get started is a valid email address and a secure password of your choosing. After your purchase is complete, your account will be created, and you will immediately gain all the benefits of being an account holder. If you have previously placed an order with us as a guest, you can try using the "Forgot Password" feature under the "Sign In" tab.
Benefits of having an account:
Real-time status updates on all your orders and returns.
Ability to view detailed order history.
Eligibility to enroll in subscription items for recurring discounts.
Access to more store features and quicker customer support.
Connection to a dedicated sales representative if placing bulk orders.
Manage your account settings:
Update your email address and password.
Unsubscribe from email promotions.
Manage item subscriptions.
Delete your account and remove your information.
We respect your privacy and are committed to protecting any personal information you may provide us through our Website. View our privacy policy for more info.
Proper assembly helps your Honeywell fan remain stable, operate quietly and direct airflow where you need it. This
guide explains general Honeywell fan assembly for tower, TurboForce, tabletop, floor and pedestal
fans, including how to attach the base, route the power cord and test the fan before regular use.
Assembly methods vary by model. Locate the model number on the bottom, back or base of the fan and compare these
instructions with the owner’s manual supplied with your product. Use only the base, screws, fasteners and other
parts intended for your specific fan.
Quick Fan Assembly Summary
Unpack the fan carefully and set the instruction manual and hardware bag aside before discarding any
packaging.
Place the fan body on a carpeted floor, towel or another protected surface while attaching the base.
Many portable fans arrive fully assembled. Tower and pedestal fans generally require additional base or
stand assembly.
Most models are assembled without tools or with a standard Phillips screwdriver. Some pedestal fans
include a thumb screw, locking nut or L-shaped base bolt.
Route the power cord through every center opening, recessed slot and holding bracket before tightening
the base.
Align tabs, screw holes and positioning marks before applying pressure. Do not force plastic base pieces
together.
Keep the fan unplugged until assembly is complete and the unit is standing upright on a stable surface.
Before Beginning Honeywell Fan Assembly
Identify Your Fan and Inspect the Parts
Different Honeywell fan families use different bases, fasteners and cord-management systems. Before beginning your
Honeywell portable fan setup, confirm that the model number on the fan matches the number shown on
the box and owner’s manual.
Depending on the model, the package may contain:
Fan or tower housing
Front and rear base halves
Left and right pedestal sections
Extension pole and floor base
Motor housing, blade and front and rear grilles
Thumb screws, Phillips screws, locking nut or L-shaped bolt
Remote control and batteries
Wall-mounting template on compatible models
Check the housing, grille, fan blades, power cord and plug for visible damage. Do not operate a fan with a cracked
housing, damaged blade, loose electrical connection or damaged cord.
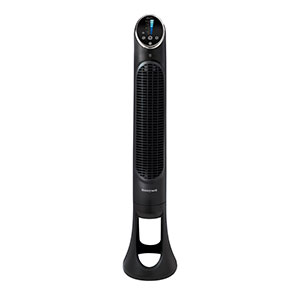
Honeywell Tower and QuietSet Fan Setup
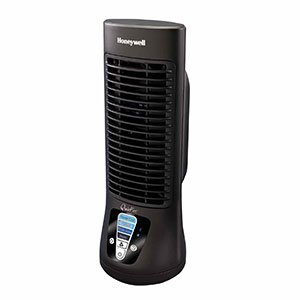
A typical Honeywell QuietSet fan setup involves assembling the pedestal or circular base, passing
the cord through the center and securing the completed base to the tower housing. The exact sequence and number of
screws vary by model.
Step 1: Unpack the Base and Tower Housing
Remove the tower housing, base sections, pedestal pieces and hardware from the box.
Set the fan body on its side or carefully turn it upside down as directed by the model’s manual.
Place the control panel away from the floor so it is not scratched or pressed during assembly.
Identify the front and rear base pieces. The rear section usually contains the power-cord opening, recessed
channel or cord-holding bracket.
Step 2: Connect the Base Halves
If you are wondering how to put the base on a Honeywell tower fan, begin by arranging the base
halves around the power cord. Do not snap the base together before confirming that the cord is positioned correctly.
Pass the plug and cord through the center opening of the base or pedestal pieces.
Align the tabs, round extrusions or interlocking connectors on the two base halves.
Press the sections together evenly until the tabs engage and the joint closes.
Inspect the seam around the base. The two halves should sit flush without a wide gap or raised edge.
If the halves do not connect easily, separate them and check their orientation. Forcing misaligned pieces can break
the tabs or cause the finished fan to wobble.
Step 3: Route the Power Cord
Correct cord placement is one of the most important parts of the
Honeywell fan base assembly instructions. A cord trapped beneath the base can make the fan lean,
wobble or sit unevenly.
Guide the power cord through the center of the pedestal and base.
Locate the recessed Honeywell fan cord routing channel on the underside or rear of the base.
Gently remove excess slack without pulling on the connection inside the fan.
Press the cord into the recessed channel, notch or holding bracket.
Confirm that the cord exits through the opening at the rear of the base and is not pinched between plastic
sections.
Some QuietSet models also provide a rear cord-management notch for storing excess cord. Fold the excess length
loosely and place it in the designated notch without sharply bending or crushing the cord.
Step 4: Secure the Base to the Tower
Honeywell tower fans may use Phillips screws, thumb screws, a locking nut or a twist-and-lock pedestal. Follow the
fastening method shown in the manual for your model.
Align the screw holes or positioning marks on the base with those on the bottom of the fan housing.
If the model has a twist-lock connection, hold the base steady and rotate it only in the direction shown in the
manual.
Insert the supplied screws or locking fastener and tighten them evenly.
Do not overtighten screws into plastic components. Stop when the base is secure and no longer moves against the
housing.
Return the fan to its upright position and press gently near the top to check its stability.
Why Does My Honeywell Tower Fan Wobble?
If the tower leans or rocks after assembly, turn it off and unplug it. Check that:
The two base halves are completely interlocked.
The pedestal and base are facing the correct direction.
All required screws are installed and evenly tightened.
The power cord is seated inside its channel instead of passing under the base.
The fan is resting on a hard, dry and level surface.
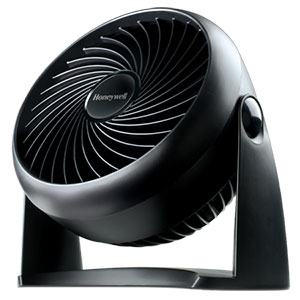
TurboForce, Tabletop and Floor Fan Setup
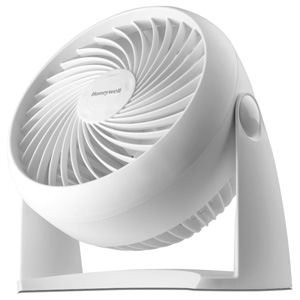
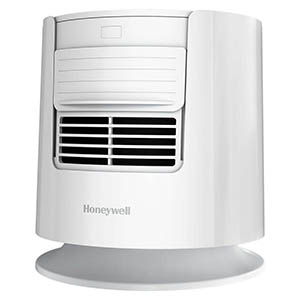
Honeywell TurboForce fan setup is generally simpler because many tabletop and air-circulator models
arrive fully assembled. Setup may only require removing the packaging, selecting a safe location and adjusting the
pivoting fan head. Larger floor or oscillating models may include base feet, a pedestal or other supports.
Tabletop and Floor Positioning
Remove all protective packaging, tape and cardboard from the fan and grille.
Confirm that the grille is secure and that nothing passes through its openings.
If separate base feet or supports are included, align their tabs or screw holes with the matching openings on
the fan frame.
Attach each support using only the supplied hardware and verify that the fan does not rock.
Place the fan on a dry, level surface where the air intake and front grille are not blocked.
Pivot the fan head to the desired airflow angle without forcing it beyond its designed range.
Do not place a tabletop fan on a bed, sofa, deep carpet or unstable shelf. Leave enough clearance around the intake
so the fan can move air freely.
Honeywell TurboForce Wall Mount Setup
Some TurboForce fans have mounting openings or keyholes built into the base. Wall-mount compatibility is
model-specific. For example, certain HT-900 and HPF820 models support wall mounting, while other TurboForce models
may be intended only for tabletop or floor use.
Before beginning a Honeywell fan wall mount setup, check the model number and confirm that wall
mounting is expressly permitted in its owner’s manual. Never mount a fan on the wall or ceiling solely because its
base appears to have openings.
Use the supplied mounting template or measure the mounting openings on the fan base.
Select a location that allows the fan to be mounted securely, preferably directly into a wall stud.
Check the area for hidden wiring and plumbing before drilling.
Install the screw type, size and quantity specified for the model. Use appropriate anchors when the manual
permits mounting outside a stud.
Leave the amount of screw head exposed specified in the owner’s manual so the keyholes can engage correctly.
Align the base openings with the screws and lower or slide the fan into the locked position.
Gently test the installation to confirm that every mounting point is engaged and the fan cannot lift off
accidentally.
Adjust the pivoting head to direct airflow without placing strain on the wall mount.
Route the cord downward and away from walkways, furniture and areas where it could be pulled.
Wall-Mount Compatibility Warning
Do not assume that every Honeywell TurboForce fan can be wall-mounted. Models such as the HT-908, HT-910 and
HF-910 are not designed for wall mounting. Never mount a portable fan to a ceiling, and do not use
oscillation while wall-mounted unless the instructions for that exact model expressly allow it.
Pedestal and Oscillating Stand Fan Assembly
Pedestal fans generally require the most assembly because the base, adjustable pole, motor housing, rear grille,
blade and front grille may be packaged separately. Keep the fan unplugged throughout the process.
Attach the Pole to the Base
Remove the base bolt and washer from the bottom of the pole if they arrive preinstalled.
Insert the pole into the base and align its tabs, slots or positioning marks.
Carefully place the base on its side while holding the pole in position.
Reinstall the washer and base bolt from underneath the base.
Tighten the bolt until the pole remains upright without twisting or rocking.
Attach the Motor Housing
Remove the thumb screw from the lower portion of the motor assembly.
Insert the motor assembly into the top of the fan pole.
Align the fastening holes and reinstall the thumb screw.
Tighten the connection so the motor housing cannot rotate independently of the pole.
Install the Rear Grille and Fan Blade
Remove the rear-grille mounting nut from the motor shaft.
Position the rear grille over the motor housing, aligning its holes or slots with the raised positioning points.
Reinstall and tighten the rear-grille mounting nut in the direction shown in the manual.
Align the center of the fan blade with the motor shaft.
Match the grooves on the rear of the blade with the shaft pins or drive bars.
Press the blade fully onto the shaft without bending it.
Install the blade cap or blade knob. Some Honeywell fans use a reverse-threaded blade knob that tightens
counterclockwise, so verify the direction before tightening.
Secure the Front Grille
Position the front grille over the rear grille and align any top marks or logos.
Close the grille clips or locking ring evenly around the entire grille.
Install the bottom safety screw if one is included with the model.
Check the complete edge to make sure there are no open sections between the grilles.
Rotate the blade gently by hand while the fan is unplugged. The blade should turn without touching either
grille.
Adjust and Lock the Extension Pole
Support the fan head while adjusting the pole. Depending on the model, loosen the height-adjustment collar or rotate
the pole to its unlocked position. Raise or lower the fan, then tighten or rotate the adjustment mechanism to lock
it securely.
Do not use unrelated screws on the pole as height controls. Only loosen the collar, knob or twist-lock mechanism
identified in the manual.
First-Time Fan Operation
Confirm that the fan is switched off.
Plug the fan directly into a properly installed wall outlet. Do not use an extension cord or power strip when
the owner’s manual prohibits them.
Turn the fan on at its lowest speed and listen for scraping, clicking or excessive vibration.
Test each available speed individually.
Activate oscillation and confirm that the fan moves smoothly without pulling or twisting the base.
Test the timer, operating modes and display-light settings when equipped.
Install the specified batteries in the remote and test it from an unobstructed position in front of the fan.
Turn the fan off and recheck the base fasteners if the unit leans, rocks or produces an unusual mechanical
sound.
Honeywell Fan Assembly Questions
Do All Honeywell Fans Require Assembly?
No. Many TurboForce and tabletop fans arrive fully assembled. Tower fans usually require base installation,
while pedestal fans may require assembly of the stand, motor housing, blade and protective grilles.
Why Will the Tower Fan Base Not Snap Together?
The base halves may be reversed, a connector may be misaligned or the power cord may be blocking the joint.
Separate the pieces, pass the cord through the correct opening and realign every tab before pressing the halves
together.
Can the Power Cord Pass Under the Tower Fan Base?
No. Route it through the center opening and designated cord channel. A cord passing beneath the base can be
damaged and may prevent the fan from standing level.
How Tight Should the Base Screws Be?
Tighten the screws until the base is secure against the fan housing. Do not overtighten screws installed in
plastic because this can strip the threads or crack the base.
Can I Wall-Mount Any Honeywell TurboForce Fan?
No. Only wall-mount a model whose owner’s manual specifically permits it. Confirm the model number before
drilling or purchasing mounting hardware.
Why Does My Pedestal Fan Blade Not Spin Freely?
Turn off and unplug the fan. Check that the blade is seated correctly on the shaft, the blade knob is installed
in the proper direction and both grilles are aligned. Do not operate the fan if the blade scrapes either grille.
Contact options may differ depending on the type of help you need.
Cookie Preferences
This site uses a small number of cookies to provide a secure and reliable shopping experience.
Required cookies are set directly by this site and are used only for essential store functions such as maintaining your shopping cart, processing checkout, providing security, and keeping the site working properly. We also use optional Google cookies for website analytics and advertising measurement. You can choose whether to allow these Google cookies below.
Required Cookies
These cookies are necessary for essential website functions, including your shopping cart, checkout, site security, and maintaining your shopping session. These cookies are set directly by this site and cannot be disabled.
Always Active
Google Analytics & Advertising Cookies
We use Google services to understand how customers use this site, improve site performance and navigation, and measure the effectiveness of our advertising. These cookies are optional. Turning them off will not affect your ability to browse, shop, or complete an order.
Learn more about how we protect your information in our Privacy Policy.