
Product Support & Resources

Featured Products

Honeywell Fan Remote and Controls Guide

Depending on the model, Honeywell fan controls may include power, speed, oscillation, timer, nighttime light-dimming and automatic temperature functions. Remote-controlled models generally duplicate most or all of the buttons found on the fan’s control panel.

This guide explains common Honeywell fan settings, remote battery replacement, timer programming, display-light controls and troubleshooting. Features vary significantly, so confirm the model number on the bottom or rear of the fan before following a button sequence.

Quick Control and Remote Overview
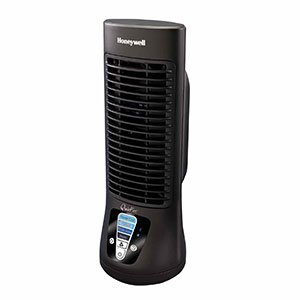
  • Remote storage: Many QuietSet tower fans have a recessed remote-storage area behind the controls. Some floor fans have a holder on the rear of the base.
  • AAA batteries: QuietSet HYF260 and HYF290 remotes use two AAA batteries.
  • Button-cell batteries: Some floor-fan remotes, including the HF715, use one CR2025 button cell.
  • Infrared operation: A remote that requires line-of-sight must be pointed toward the fan’s receiver.
  • Radio communication: If a model uses a paired radio remote, follow only the pairing procedure supplied with that exact model.
  • Battery safety: Keep button-cell batteries away from children. Stop using a remote if its battery compartment does not close securely.

Do not assume that every Honeywell fan remote requires pairing. Many remotes begin working as soon as the correct batteries are installed.

Identify the Fan and Remote

Find the Fan Model Number

Look for a product label on the bottom, rear housing or underside of the base. Record the complete model number, including letters such as HYF, HSF, HF or HTF and any series designation.

Check the Remote

Before installing batteries, inspect the remote for:

  • Battery type printed inside the compartment
  • Positive and negative polarity markings
  • A protective pull tab on a new button-cell remote
  • A model or part number on the rear label
  • A cracked or incomplete battery cover
  • Evidence of leaking or corroded batteries

Never install a battery based solely on the remote’s physical size. Use the battery type printed on the remote or specified in the owner’s manual.

Understanding Honeywell Fan Controls

Power Button

Press the power button once to turn the fan on. Press it again to turn the fan off. Some models return to a default speed each time they are powered on rather than remembering the previous setting.

If the fan does not respond:

  • Check the wall outlet.
  • Inspect the fused safety plug.
  • Use the physical control panel instead of the remote.
  • Cancel timer or temperature-control settings.

Fan Speed Button

Press the speed button repeatedly to move through the available settings. The sequence returns to the beginning after the highest level.

Honeywell fans may provide:

  • Three traditional speeds: low, medium and high
  • Five QuietSet sound and airflow levels
  • Eight QuietSet levels ranging from Sleep to Power Cool

Some digital floor fans start at high speed. QuietSet tower fans commonly start at their lowest Sleep setting.

QuietSet Speed Modes

A Honeywell QuietSet fan settings guide should distinguish sound level from temperature. QuietSet names describe graduated combinations of airflow and operating sound; they do not normally represent thermostat temperatures.

Depending on the model, named levels may include:

  • Sleep
  • Whisper
  • Calm
  • White Noise
  • Relax
  • Refresh
  • Cool
  • Power Cool

Sleep provides the lowest airflow and quietest operation. Power Cool provides the strongest airflow and highest operating sound. Models with fewer settings use only a portion of this range or display numbered levels instead.

Oscillation Button

Press the oscillation button once to start side-to-side movement. Press it again to stop oscillation.

If the oscillation indicator illuminates but the fan does not turn:

  • Check for furniture or walls blocking the sweep.
  • Confirm that the cord is not wrapped around the base.
  • Check the tower base and cord-routing channel.
  • Listen for clicking or grinding from the oscillation mechanism.

Honeywell Fan Timer Setting

The timer is an automatic shutoff control. It does not schedule a future startup time.

QuietSet 1, 2, 4 and 8-Hour Timer

On compatible QuietSet models, program the Honeywell fan timer setting as follows:

  1. Press the timer button once for one hour.
  2. Press it twice for two hours.
  3. Press it three times for four hours.
  4. Press it four times for eight hours.
  5. Press it a fifth time to turn the timer off.

The illuminated number indicates the selected automatic shutoff interval.

Models With a 1, 2 and 4-Hour Timer

Some floor and tabletop fans provide only one-, two- and four-hour options:

  1. Press once for one hour.
  2. Press twice for two hours.
  3. Press three times for four hours.
  4. Press four times to cancel the timer.
Why Did My Fan Turn Off by Itself?

Check the timer indicators before troubleshooting the outlet or motor. A fan that shuts off after exactly one, two, four or eight hours is likely following its selected timer setting.

Honeywell Fan Display Light Dimming

Honeywell fan display light dimming behavior depends on the QuietSet model.

Automatic Dimming

On certain HYF260 models, the control-panel light automatically dims to approximately 50 percent after about 15 seconds without a control change. Touching a control returns the display to full brightness.

This is normal and does not indicate a failing display or loss of power.

Five Manual Brightness Levels

Compatible HYF290 models start at 100 percent brightness when powered on. Press the light button repeatedly to select:

  1. One press: 75 percent brightness
  2. Two presses: 50 percent brightness
  3. Three presses: 25 percent brightness
  4. Four presses: Display off
  5. Five presses: Return to 100 percent brightness

Turning off the display light does not turn off the fan. Airflow, oscillation and timer functions continue operating.

Using the Honeywell Fan Remote

A compatible Honeywell fan remote generally provides the same basic functions as the control panel:

  • Power on and off
  • Fan speed selection
  • Oscillation on and off
  • Automatic shutoff timer
  • Display-light control on equipped models
  • Temperature or automatic mode on certain older models

Remote Storage

Store the remote in its recessed holder when it is not in use. The storage area may be behind the control panel, on the rear housing or at the back of the fan base.

Do not leave a button-cell remote where children or pets can access it.

Infrared Remote Operation

An infrared remote requires a reasonably clear path to the fan’s receiver.

  • Point the front of the remote toward the fan.
  • Remove objects between the remote and receiver.
  • Clean the receiver window with a dry microfiber cloth.
  • Try the remote from directly in front of the fan.
  • Avoid testing in intense direct sunlight, which may reduce infrared performance.

RF Remote Operation and Pairing

Some electronic fans may use radio communication, but there is no universal Honeywell fan pairing sequence. Do not use pairing instructions intended for a ceiling fan, heater or different fan model.

If the owner’s manual does not provide a Learn, Pair or Sync procedure, the remote is usually not intended to be manually paired. Install the correct batteries, power-cycle the fan and test the remote again.

Honeywell Fan Remote Battery Replacement

Replacing AAA Batteries

  1. Turn the remote over and slide the battery door in the direction of its arrow.
  2. Remove both old batteries.
  3. Check the polarity diagram inside the compartment.
  4. Install two matching new AAA batteries.
  5. Slide the battery cover closed until it locks.
  6. Test the remote from directly in front of the fan.

Do not mix old and new batteries or different battery chemistries.

Replacing a CR2025 Button Cell

  1. Open the battery tray or compartment as indicated on the remote.
  2. Note which side of the existing battery faces upward.
  3. Remove and safely contain the old battery.
  4. Install one new CR2025 battery using the marked polarity.
  5. Close the compartment completely.
  6. Remove any protective activation tab from a new remote.
Button-Cell Battery Safety

Button-cell batteries can cause severe injury if swallowed. Keep new and used batteries away from children. If the battery compartment will not close securely, remove the battery and stop using the remote.

Cleaning Battery Terminals

If the old batteries leaked:

  1. Wear disposable gloves and remove the batteries without touching residue directly.
  2. Keep leaked material away from your eyes and skin.
  3. Wipe minor terminal residue with a cotton swab lightly dampened with electronics-safe isopropyl alcohol.
  4. Do not pour liquid into the remote.
  5. Allow the compartment to dry completely.
  6. Replace the remote if corrosion is extensive or contacts are damaged.

Honeywell Fan Remote Not Working Reset

There is no universal frequency or factory-reset sequence for every Honeywell fan. Use this safe Honeywell fan remote not working reset procedure:

  1. Test the fan using its physical control panel.
  2. Remove the remote batteries.
  3. Turn off and unplug the fan.
  4. Leave both the fan and remote without power for approximately 60 seconds.
  5. Install fresh batteries in the remote.
  6. Reconnect the fan directly to a working wall outlet.
  7. Turn it on using the physical power button.
  8. Point the remote directly at the receiver and test the power button.

This power cycle may clear a temporary control condition. It does not pair incompatible remotes or repair a failed transmitter, receiver or control board.

Test an Infrared Remote With a Phone Camera

  1. Open the camera application on a smartphone.
  2. Point the remote’s emitter toward the camera lens.
  3. View the emitter on the phone’s screen.
  4. Press and hold a remote button.
  5. Look for a flashing white, blue or purple light on the screen.

Some phone cameras filter infrared light, so a negative result is not conclusive. Try the front-facing camera or compare the result with a known-working infrared remote.

Honeywell Tower Fan Remote Control Replacement

For a Honeywell tower fan remote control replacement, match the replacement to the complete fan model number. Similar-looking remotes may use different command codes or communication methods.

Before ordering, verify:

  • Complete fan model number
  • Remote part number when printed on the original
  • Battery type
  • Button layout and supported features
  • Whether the remote is infrared or model-paired
  • Return policy if compatibility is uncertain

A universal ceiling-fan remote is not a suitable replacement for a portable Honeywell fan remote.

Troubleshooting Unresponsive Control Buttons

Clean the Control Panel

  1. Turn off and unplug the fan.
  2. Wipe the control panel with a dry microfiber cloth.
  3. Use a dry cotton swab around button edges.
  4. Do not spray cleaner onto the panel.
  5. Do not use enough moisture to enter button or display openings.

Power-Cycle the Fan

  1. Turn off the fan.
  2. Unplug it for approximately 60 seconds.
  3. Reconnect it directly to a working outlet.
  4. Press the physical power button once.
  5. Test each control individually.

If one button remains unresponsive while the others work, the individual switch or touch control may have failed. If the entire panel is dead, check the outlet, cord and fused safety plug.

Honeywell Fan Control Panel Light Blinking

A Honeywell fan control panel light blinking does not necessarily indicate an error. Honeywell portable fans do not share one universal blinking-light fault code.

Normal Reasons a Light May Blink

  • A timer or speed setting is being selected.
  • An automatic temperature setpoint is being programmed.
  • The display is showing a temporary setting before returning to room temperature.
  • A control button is being pressed repeatedly.

Temperature-Control Models

Certain older models allow the user to select a temperature setpoint. During programming, the displayed value may flash. The fan can stop when room temperature falls below the setpoint and restart when the temperature rises.

If a thermostat-equipped fan appears to have stopped working:

  1. Check whether temperature mode is active.
  2. Increase the setpoint or cancel automatic temperature control.
  3. Select a regular fan-speed mode.
  4. Confirm that the timer is off.

Abnormal Blinking

Power-cycle the fan if lights blink continuously and controls do not respond. If blinking returns immediately, record the pattern and contact product support with the model number. Do not assume a code meaning from another fan or appliance.

Remote and Control Troubleshooting by Symptom

Control Panel Works but the Remote Does Not

  • Replace the remote batteries.
  • Check polarity.
  • Remove the protective battery tab.
  • Clean the transmitter and receiver windows.
  • Test from directly in front of the fan.
  • Verify replacement-remote compatibility.

Remote Works Only at Close Range

  • Install fresh batteries.
  • Remove objects blocking line-of-sight.
  • Clean the receiver area.
  • Move the fan away from intense sunlight.
  • Check for battery-terminal corrosion.

Neither the Remote nor Panel Works

  • Test the wall outlet.
  • Inspect the fused safety plug.
  • Check the cord for damage.
  • Power-cycle the fan.
  • Contact support if it remains completely unresponsive.

Fan Will Not Turn Off

  • Press the physical power button once.
  • Check for a stuck control button.
  • Unplug the fan if the controls do not respond.
  • Do not continue using a fan with a failed power control.

Honeywell Fan Control Questions

Do Honeywell Fan Remotes Need to Be Paired?

Many portable-fan remotes do not require user pairing. Install the correct batteries and point the remote at the fan. Follow a pairing process only when the model’s manual provides one.

Why Does My QuietSet Fan Start on Low?

Compatible QuietSet models begin at the Sleep setting when first turned on. Press the fan-speed button repeatedly to increase airflow.

How Do I Cancel the Fan Timer?

Continue pressing the timer button until no timer indicator is illuminated. On a 1-, 2-, 4- and 8-hour model, the fifth press turns the timer off.

Can I Turn Off the Display but Keep the Fan Running?

Yes, on models with manual nighttime dimming. Cycle the light button to the display-off setting. The fan continues operating with the control-panel light off.

Why Does the Control Panel Dim by Itself?

Some QuietSet models automatically reduce panel brightness after approximately 15 seconds and return to full brightness when a setting changes.
Related Products

Related Support Topics

Explore related support articles and resources for this topic.

View All Product Support Topics

Haven't found the answer? We can help.

Contact Us

Contact options may differ depending on the type of help you need.

0 $0.00
Top