




Product Support & Resources

Featured Products

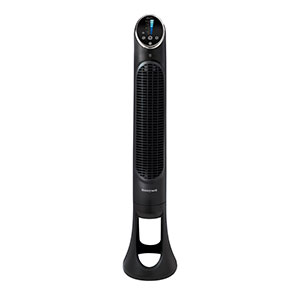
How to Clean a Honeywell Tower Fan

Dust, pet hair and lint can accumulate around a tower fan’s intake grille and internal cylindrical fan drum. This buildup may reduce airflow, create unpleasant odors or make the fan sound louder than it did when new. Regular cleaning can help maintain steady airflow and quiet operation.

This guide explains how to clean Honeywell tower fan models, including popular QuietSet fans. Begin with the recommended no-disassembly method. Base removal can be used for a more thorough exterior cleaning on compatible models, but the electrical housing and motor should not be opened for routine maintenance.

Before Cleaning Your Honeywell Tower Fan

Identify the Model

Find the model number on the product label, usually located on the bottom, rear housing or underside of the base. QuietSet models may use different base fasteners, locking collars and cord-routing systems even when the fans look similar.

Check the owner’s manual before removing any part. The manual will indicate whether the base is attached with thumb screws, Phillips screws, a locking nut or a twist-lock pedestal.

Inspect the Fan

Before beginning Honeywell tower fan dust removal, inspect the fan for conditions that cleaning will not correct:

Do not operate or disassemble a damaged fan. Contact the manufacturer’s consumer support department for guidance.

Method 1: Fast Cleaning Without Disassembly

This is the recommended first method for how to clean Honeywell QuietSet tower fan models. Honeywell generally recommends cleaning through the grilles with a flexible dust wand, vacuum or compressed air rather than opening the motor housing.

Step 1: Unplug and Move the Fan

  1. Turn the fan off using its power button.
  2. Grip the plug and remove it from the wall outlet. Do not pull on the cord.
  3. Move the fan to a well-ventilated cleaning area.
  4. Place it upright on a dry, hard and level surface.
  5. Remove the remote from its storage area and set it aside.

Step 2: Vacuum the Rear Intake Grille

The tall rear intake grille commonly collects the heaviest dust because room air is pulled through it during operation.

  1. Attach a soft brush or narrow crevice tool to the vacuum.
  2. Begin at the top of the rear grille and work downward.
  3. Move the attachment slowly across the grille openings without pressing hard against the plastic.
  4. Vacuum around the rear handle, remote-storage compartment and lower air-intake openings.
  5. Repeat the process until loose dust and pet hair are no longer visible.

A soft brush attachment is preferable because a hard nozzle can scratch the housing or damage narrow grille sections.

Step 3: Clean the Front Outlet Grille

  1. Turn the unplugged fan so the front outlet faces you.
  2. Vacuum the grille from top to bottom using light pressure.
  3. Use a flexible dusting wand or pipe cleaner to loosen dust between narrow openings.
  4. Vacuum again to collect the loosened material.
  5. Do not push a cleaning tool deeply enough to contact or bend the internal drum.

This Honeywell tower fan grill cleaning process can remove substantial buildup without taking the fan apart.

Step 4: Use Compressed Air

Compressed air can loosen dust attached to internal surfaces that the vacuum cannot reach.

  1. Keep the fan unplugged and position it in a ventilated area.
  2. Keep the compressed-air can upright to reduce the possibility of liquid propellant escaping.
  3. Follow the distance and handling directions printed on the can.
  4. Direct short, controlled bursts through the front and rear grilles.
  5. Move along the grille instead of concentrating pressure in one location.
  6. Vacuum the outside of the fan again after the loosened dust settles.

Do not insert the air nozzle deeply into the grille. Avoid using enough air pressure to make the internal drum spin at excessive speed.

Prevent Dust From Spreading Indoors

Compressed air may send fine dust into the room. When possible, clean the fan in a garage, covered outdoor area or another well-ventilated location. Keep the fan dry and do not use compressed air near food, bedding or sensitive electronics.

Step 5: Wipe the Outer Housing

  1. Use a dry microfiber cloth to wipe the rear housing and intake grille.
  2. Lightly dampen a second cloth and wring it out thoroughly before wiping other exterior plastic surfaces.
  3. Remove dust from the handle, base and exterior seams.
  4. Do not allow moisture to run into the grille or collect around buttons and display openings.
  5. Finish with a clean, dry cloth.

Step 6: Clean the Control Panel and Remote

Use a dry microfiber cloth to clean the control panel. For debris around buttons, use a dry cotton swab without pressing it into the housing.

Wipe the remote with a soft dry cloth. Do not spray cleaner directly onto the remote or fan. If a slightly damp cloth is necessary, remove the remote batteries first and allow the remote to dry completely before reinstalling them.

Step 7: Clean the Base and Oscillation Area

  1. Vacuum around the joint between the fan housing and base.
  2. Use a dry cotton swab or flexible brush to remove lint from the exterior oscillation seam.
  3. Wipe the top and sides of the base with a microfiber cloth.
  4. Do not pour lubricant, oil or cleaner into the oscillation mechanism.

Method 2: Deeper Cleaning and Base Removal

A deeper cleaning can include removing an owner-assembled base, cleaning the cord channel and repeating the vacuum-and-air process from several angles. Base removal does not provide authorized access to the motor, controls or internal wiring.

Important Disassembly Limitation

Honeywell QuietSet owner’s manuals warn users not to open the motor housing because doing so may damage the fan, cause personal injury or affect warranty coverage.

If you are researching how to take apart Honeywell QuietSet tower fan models, limit owner disassembly to parts identified in the assembly section of the manual, such as the base, pedestal, locking nut and cord holder. Do not separate the main plastic shell halves or remove concealed or Torx housing screws for routine cleaning.

Step 1: Document the Base Assembly

  1. Photograph the underside and rear of the assembled base.
  2. Note where the cord exits the base.
  3. Identify the cord guides, thumb screws and locking collar or nut.
  4. Compare these parts with the assembly diagram in the model’s manual.

This reference will make Honeywell tower fan base reassembly easier after cleaning.

Step 2: Remove the Base on Compatible Models

The following sequence is typical of certain QuietSet models that use two base halves, thumb screws and a locking nut. Stop if the configuration does not match your model.

  1. Turn off and unplug the fan.
  2. Place the fan carefully on its side on a padded surface.
  3. Remove the thumb screws from the underside of the base and place them in a container.
  4. Gently release the power cord from the internal cord guides.
  5. Rotate the locking nut counterclockwise until it releases from the bottom of the fan housing.
  6. Pass the plug and cord back through the locking nut.
  7. Support the fan housing while sliding the assembled base away from it.
  8. Separate the base halves only if they are designed to snap apart and the manual shows this step.

Other models may use Phillips screws or a pedestal that rotates to unlock. Follow the instructions for the exact model rather than forcing the base to separate.

Step 3: Clean the Base and Cord Channel

  1. Vacuum both sides of the detached base.
  2. Remove debris from the center opening, cord guides and rear exit notch.
  3. Wipe the plastic base with a soft damp cloth.
  4. Dry the base thoroughly before reassembly.
  5. Inspect the power cord for flattened, cut or worn areas.

Do not soak the base if it contains wiring, controls or an oscillation mechanism. Use only a cloth for any part that is not a separate piece of plain plastic.

Step 4: Clean the Drum Blades Through the Grille

To clean QuietSet tower fan drum blades, work through the existing air openings instead of separating the housing.

  1. Position the unplugged fan so light shines through the outlet grille.
  2. Use a flexible dust wand to loosen visible lint near the grille without pushing against the drum.
  3. Vacuum the loosened debris through the nearest grille opening.
  4. Use short bursts of compressed air to release dust from the cylindrical blade surfaces.
  5. Alternate between the front and rear grilles to clean dust from both sides of the airflow path.
  6. Repeat the vacuuming process until little additional debris is released.

Do not insert a screwdriver, rigid brush, fingers or metal tools through the grille to rotate or scrape the drum. The narrow blades can be damaged or knocked out of balance.

Step 5: Clean Around the Motor Housing

The motor should remain enclosed. Use compressed air and vacuum suction only through the exterior ventilation openings.

Should You Remove the Rear Housing Screws?

No, not for normal owner maintenance. Screws holding the two main shell halves together generally provide access to the motor, wiring, oscillation mechanism and electronic controls. Official QuietSet cleaning instructions direct owners to use a vacuum, flexible dust wand or compressed air through the grilles.

If internal hair or lint cannot be removed through the openings, contact Honeywell fan support or a qualified appliance technician. Professional service is the safer choice than forcing apart plastic tabs or removing service-only fasteners.

Honeywell Tower Fan Base Reassembly

Reconnect the Base Halves

  1. Confirm that the base pieces are clean and completely dry.
  2. Arrange the front and rear pieces in their original orientation.
  3. Pass the power cord through the center opening before snapping the pieces together.
  4. Align every tab and connector.
  5. Press the base halves together evenly until they are securely interlocked.

Attach the Fan Housing

  1. Pass the cord and plug through the center of the assembled base.
  2. Align the rear of the tower housing with the rear cord-exit area of the base.
  3. Lower the housing into the base and rotate it gently until it is fully seated.
  4. Pass the power cord through the locking nut.
  5. Thread the locking nut onto the fan housing by turning it clockwise.
  6. Tighten it until the housing is secure. Some models produce a ratcheting sound when properly tightened.

Route and Secure the Cord

  1. Place the fan carefully on its side.
  2. Gently remove excess slack from the cord without pulling on the connection inside the fan.
  3. Press the cord into the guides along the underside of the base.
  4. Route it through the designated rear notch.
  5. Reinstall the thumb screws or other supplied base fasteners.
  6. Confirm that the cord does not pass beneath the base.
Why Proper Cord Routing Matters

A cord trapped beneath the base can make the tower fan lean or wobble. It may also crush the cord’s insulation. Always use the molded cord guides and rear exit channel provided with the base.

Portable Fan Setup and Testing

Complete a basic Honeywell portable fan setup inspection before restoring power.

Pre-Power Inspection

Run a Low-Speed Vibration Check

  1. Place the fan upright on a dry, hard and level surface.
  2. Confirm that the power control is off.
  3. Plug the fan directly into an appropriate wall outlet.
  4. Start the fan at its lowest speed.
  5. Listen for scraping, clicking, grinding or excessive vibration.
  6. Test each additional speed one at a time.
  7. Activate oscillation and verify that the base remains flat and stable.
  8. Turn off and unplug the fan if it wobbles, scrapes or produces an unusual odor.

Honeywell Tower Fan Cleaning Questions

How Often Should a Honeywell Tower Fan Be Cleaned?

Inspect the intake grille approximately once a month during regular use. Clean the fan when a visible layer of dust forms or when airflow begins to decrease. Homes with pets, open windows or substantial airborne dust may require more frequent cleaning.

Can I Wash the Tower Fan Grilles?

No. The grilles are part of the electrical housing and should not be sprayed, rinsed or immersed. Use a vacuum, dry brush, compressed air and a soft exterior cloth.

Can I Open a QuietSet Fan to Clean the Drum?

Opening the main housing is not part of the manufacturer’s owner-cleaning procedure. Clean the drum through the existing grille openings. If compacted debris remains inaccessible, contact consumer support or a qualified technician.

Why Is My QuietSet Fan Still Noisy After Cleaning?

Check that the base is installed correctly, the cord is not trapped underneath and the fan is standing on a level surface. Persistent grinding, scraping or electrical buzzing may indicate an internal problem that cleaning will not correct.

Can I Spray Cleaner Into the Rear Intake?

No. Liquid can reach the motor or electronic controls. Apply a small amount of water only to a cloth, wring it out thoroughly and wipe approved exterior surfaces.

Why Does My Tower Fan Wobble After Reassembly?

Make sure the locking nut is secure, both base halves are fully interlocked, the thumb screws are installed and the power cord is inside its routing channel. A cord trapped beneath the base is a common reason a reassembled fan will not sit flat.
Related Products

Related Support Topics

Explore related support articles and resources for this topic.

View All Product Support Topics

Haven't found the answer? We can help.

Contact Us

Contact options may differ depending on the type of help you need.

0 $0.00
Top